How To Resize a WEBP Image
Resizing WEBP images with TrimIMG is easy and fast. The tool is designed in such a way that it enables users to optimize images without having technical expertise.
Step 1: Upload Your WEBP Image
Your file must be uploaded to the TrimIMG tool. The tool accepts WEBP images and processes them instantly.
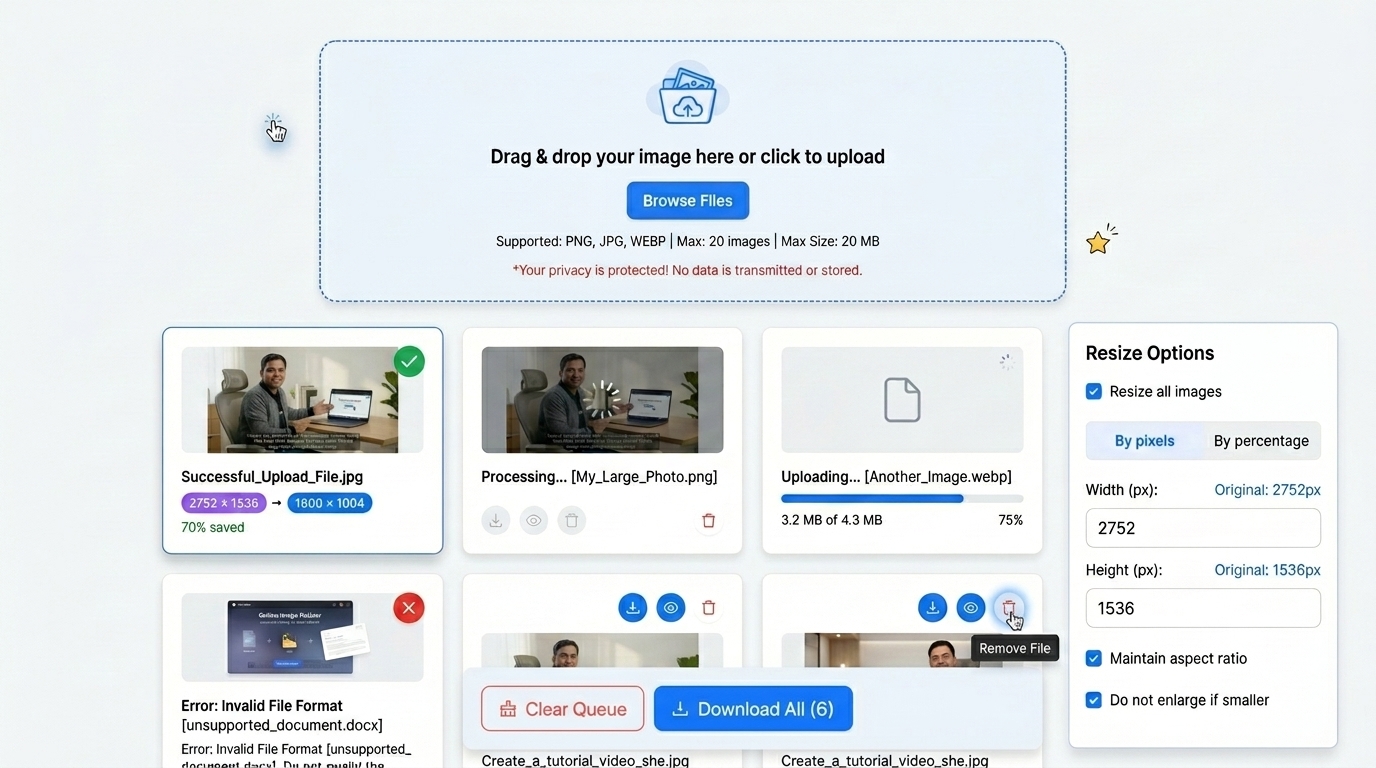
Step 2: Select Dimensions: Width and Height.
A WEBP image can be resized using new width and height values. There is also the option of resizing by percentage in case you want to make the image proportional.
Step 3: Maintain Aspect Ratio For Best Results
The stretching is avoided by maintaining the aspect ratio. The picture remains natural and harmonious.
Step 4: Download The Resized WEBP Image
Once the size has been adjusted, the tool creates the new image as soon as possible. You may download the optimized file and apply it to your site.
Watch: How to Resize Images Online
Step-by-step video guide · TrimIMG
Features Of TrimIMG WEBP Resizer
TrimIMG provides useful image optimization tools.
Resize WEBP Image By Pixels
Users can customize the width and height. This can be useful in banners of blog pictures or thumbnails.
Resize WEBP Image By Percentage
This is the option that lowers the size of the image without compromising the proportions.
Maintain Image Quality
TrimIMG preserves image clarity even in resized images. This eliminates blur or distortion.
Fast Online Processing
The application is web-based and fast in processing images. No installation is required.
Why Choose TrimIMG to Resize WEBP images
TrimIMG allows resizing of WEBP images without quality loss. The utility maintains the sharpness and clarity of your images even after resizing. It does not matter what kind of logo, illustration, scanned document, or photo you are working with; the outcome remains accurate and professional. You are also able to convert and resize WEBP images online, which saves time and makes them easier to edit.
Multiple Image Formats Supported
The tool is compatible with various types of images, such as


